Instructions for creating an ODBC (Open Database Connectivity) data source for Microsoft windows XP.
The following steps will guide you into creating an ODBC datasource for using the three experimental dababase applets in the Web-Oriented Applications of Databases Laboratory.
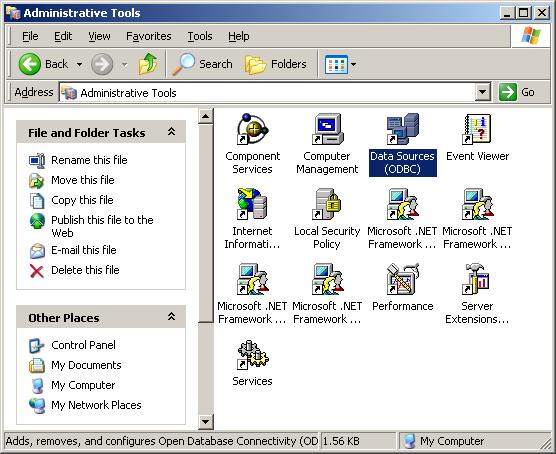
1. Go to Control Panel and double click on the "Administrative Tools" icon. In the Administrative Tools, you will find the "Data Sources (ODBC)" Icon. Double click on it.
|
2. The following window will appear. Click the second tab (System DNS) and you should see the following image. Click on the "Add..." button.
 |
3. After clicking "Add..." from step 2, the following screen will appear. Scroll the list to the last record and select "SQL Server". Click "Finish".
 |
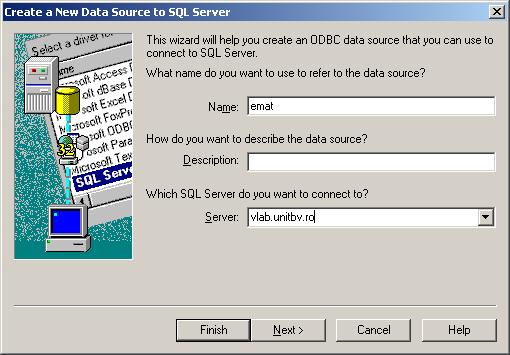
4. The following window will appear. Here, type in "emat" in the Name field. Type "vlab.unitbv.ro" in the "Description" field and click Next.
 |
5. In the following window, select "With SQL Server authentication using a login ID and password entered by the user.". Check the "Connect to SQL Server to obtain default settings for the additional configuration options" box. Enter "emat" as Login ID and "__emat!!2005" as password. Click Next.
 |
6. In the window below, check the "change the default database to:" box and choose "emat" from the dropdown list. Click next.
 |
7. In the following screen click "Finish".
 |
8. Click on the "Test data source" button for making sure the ODBC data source is working. After that, click Ok in the window below. Now, the ODBC data source is set up and ready to use.
 |